Section content
The section content is stored in the project.db as plain text and is converted to HTML for rendering. For typesetting, Markdown and Latex-like syntax can be used.
Inline markup syntax
Markdown syntax
Markdown syntax can be used for following inline typesetting:
syntax |
HTML rendering |
|---|---|
|
Create level 1 “TITLE” |
|
Create level 2 “TITLE” |
|
Create level 3 “TITLE” |
|
Make “TEXT” bold |
|
Make “TEXT” italics |
|
Write inlince “CODE” |
|
Create link with “NAME” that directst to “URL” |
|
Create inline “MATH” symbols and equations. |
Latex like syntax
Latex like syntax can be used for the following inline typesetting:
syntax |
HTML rendering |
|---|---|
|
Make “TEXT” green |
|
Make “TEXT” red |
|
Create a button with “LABEL” that directs to “URL” |
Icons
The following icons are available for inline use:
syntax |
HTML rendering |
|---|---|
|
|
|
|
|
|
|
|


Multiline markup syntax
Markdown syntax
The following markdown syntax can be used for multi-line typesetting:
Lists
using asterisks:
* item1
* item2
  -- Second level for item2
* item3
or using dashes:
- item1
- item2
  -- Second level of item2
- item3
of using + for numbered lists:
+ item1
+ item2
  -- Second level of item2
+ item3
Note: in numbered lists, only the first level is numbered.
HTML rendering
Code blocks
```
def foo(x):
    return x + 1

print(foo(10))
```
HTML rendering
Multi-line math
$$
x + y = z \\
y + z = 4
$$
HTML rendering
Latex like syntax
The Latex like syntax for multi-line typesetting has the following general syntax:
\begin{markup}[options]
entry
\end{markup}
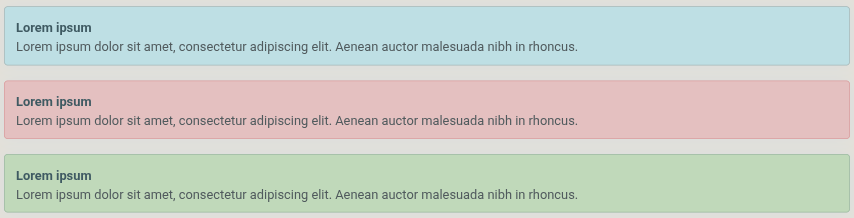
Colored notes
\begin{note}[blue]
**Lorem ipsum**
Lorem ipsum dolor sit amet, consectetur adipiscing elit. Aenean auctor malesuada nibh
in rhoncus.
\end{note}
Colored notes are available with blue, red and green background and the color is passed in the options:
\begin{note}[blue]\begin{note}[red]\begin{note}[green]
HTML rendering
Tables
Create table manually:
\begin{table}[title: My title]
col1, col2, col3, col4
10, 20, 30, 40
100,200,300,400
100.21, 200.34, 300.55, 400.59
\end{table}
When creating tables manually, the following options can be passed:
title: if omitted, the table header defaults to the title “Table [NUMBER]”. If included, for instancetitle: My title, it gives the possibility to add a custom title to the table “Table [NUMBER]: My title”. The table number gets incremented based on the number of tables that exist in a given section.
Load table from a file:
\begin{table}[project:PROJECT, file:FILE, title: My title]
\end{table}
When loading tables from file the following options are available:
title: see above.project: it refers to the name of an existing project and is optional. If omitted, the current project is considered.file: the file path to load a table from. This path should be an existing file relative to the root directory of the project. For instance,file: sections/1/foo.csv. Wildcards can also be used, examplefile: sections/1/*.csv. In this case, a table will be created for each file. The delimiter can be comma or tab and is identified from the first line of each file that should contain the names of the table columns.
HTML rendering

Figures
Specify figures manually.
\begin{figures}[title:My title]
project: PROJECT
figure: figure_1.png
caption: This is the caption of the Figure 1

project: PROJECT
figure: figure_2.png
caption: This is the caption of the Figure 2
\end{figures}
Figures can have one or more entries. Each entry is consisted of the following fields:
project: refers to the name of an existing project and is optional. If omitted, the current project is considered.figure: should be the path to an existing figure relative to the root directory of the project.caption: refers to the caption of the figure and is optional. If omitted, the caption “Caption not available” is rendered.
When creating figures manually, the following options are available:
title: if omitted, the figures header defaults to the title “Figures”. If included, for instancetitle: My title, it gives the possibility to add a custom title to the figures header “Figures: My title”.
Specify figures using wildcards:
\begin{figures}[project:PROJECT, file:FILE, title:My title]
\end{figures}
When specifying figures using wildcards, the user cannot add captions to each figure and the following options are available:
title: see above.project: refers to the name of an existing project and is optional. If omitted, the current project is considered.file: it refers to the path relative to the root directory of the project, examplefile: sections/1/*.jpg.
Figures are rendered as clickable thumbnails.
HTML rendering
Files
Files can have one or more entries.
\begin{files}[title:My title]
project: PROJECT
file: sections/2/file1.csv
caption: This is the caption for file1.

project: PROJECT
file: sections/2/file2.xlsx
caption: This is the caption for file2.

project: PROJECT
file: sections/2/file3.pdf
caption: This is the caption for file3.
\end{figures}
Each entry is consisted of the following fields:
project: refers to the name of an existing project and is optional. If omitted, the current project is considered.file: should be the path to an existing file relative to the root directory of the project.caption: refers to the caption of the figure and is optional. If omitted, the caption “Caption not available” is rendered.
Files can have the following options:
title: if omitted, the files header defaults to the title “Files”. If included, for instancetitle: My title, it gives the possibility to add a custom title to the files header “Files: My title”.
HTML rendering

When files are clicked, they open with the default program.
Foldable content
To create foldable content the following syntax should be used:
\begin{fold}[Fold title]
TEXT
\end{fold}
HTML rendering